How to Disable Edge Browser Sync with Chrome and Ensure Browser Privacy
In today's digital age, maintaining control over your browser data is crucial to safeguarding your privacy and ensuring a seamless browsing experience. If you find yourself frustrated by Edge syncing with Chrome, causing duplicated bookmarks, conflicting preferences, and potential privacy issues, worry not. This article guides you through the process of un-synchronizing Edge from Chrome, putting you in command of your browsing data.
How to Enable and Disable Sync in Edge Browser
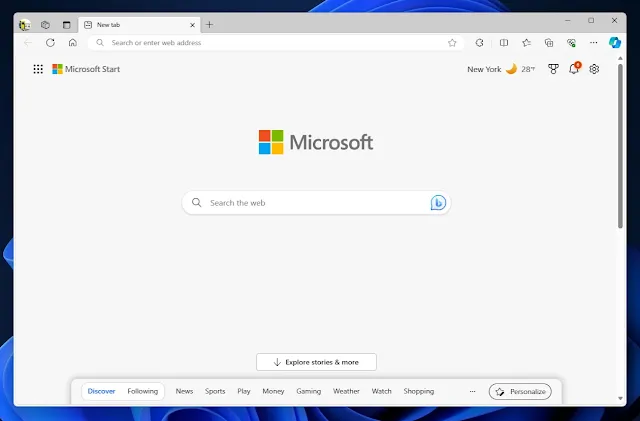
Step 1: Open Edge Browser
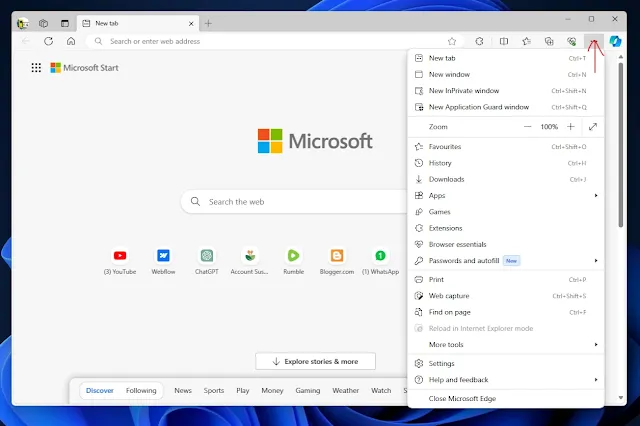
Step 2: Access Browser Options
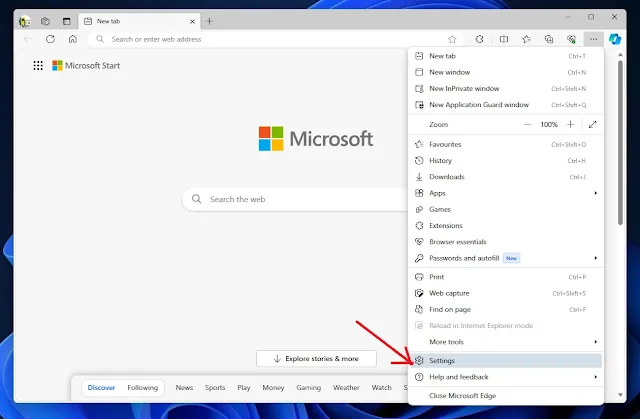
Step 3: Navigate to Settings
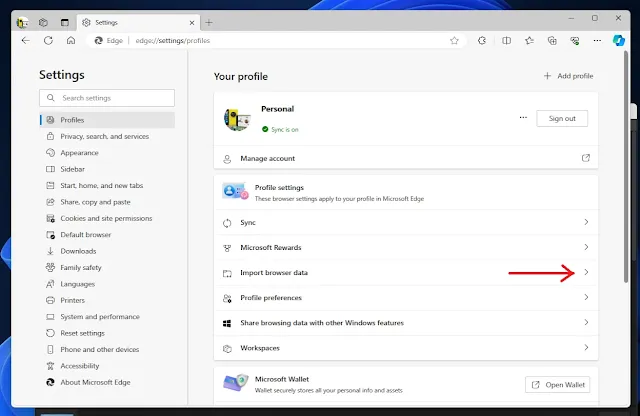
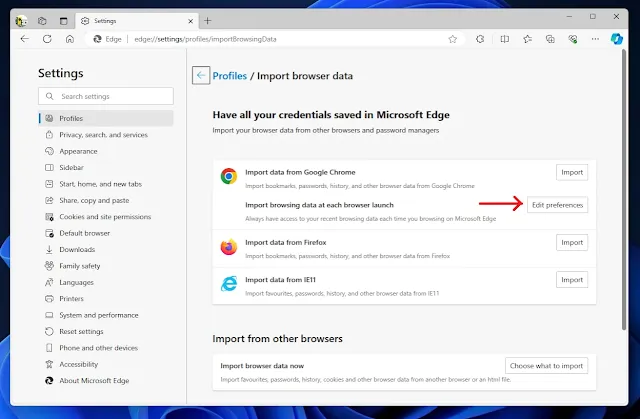
Step 4: Locate Import Browser Data Settings
Step 5: Edit Preferences
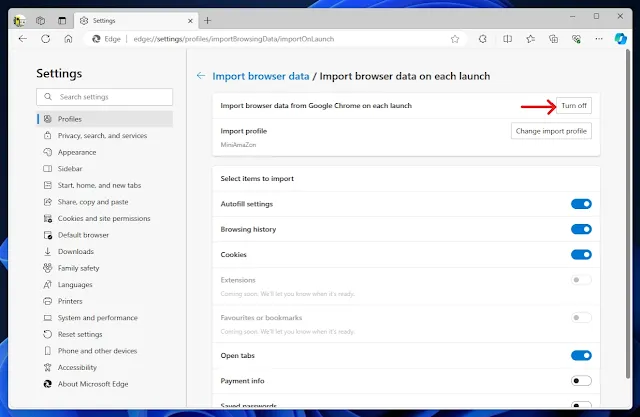
Step 6: Turn Off Sync
Step 7: Confirmation
Understanding the Syncing Bug
Microsoft Edge, despite its stellar performance, comes with an undesired syncing bug, particularly noticeable if you use both Edge and Google Chrome. This bug leads to the automatic importation of browser data from Chrome every time you launch Edge.
The Downside of Synced Browsers
While browser syncing can be beneficial for a seamless experience, it may pose challenges for some users. Synced browsers duplicate bookmarks, favorites, history, passwords, auto-fills, tabs, and sessions, raising data privacy concerns and compatibility issues. Unintended changes on one browser may reflect on the other, potentially causing frustration and inconvenience.
Read:
How to Stop Edge from Syncing with Chrome
Follow these steps to regain control over your browser data and stop Edge from syncing with Chrome:
Step 1: Open Edge Browser
Launch your Edge browser and observe if your Chrome bookmarks are imported.
Step 2: Access Browser Options
Click on the three dots at the top of the browser to open additional options.
Step 3: Navigate to Settings
From the options menu, choose "Settings."
Step 4: Locate Import Browser Data Settings
Under Settings, find your profile's settings and look for the "Import Browser Data" section.
Step 5: Edit Preferences
In the browser data section, identify the browser (Chrome) from which data is imported. Click on "Edit Preferences."
Step 6: Turn Off Sync
In the new window, locate and click on "Turn Off" to disable the synchronization feature completely.
Step 7: Confirmation
A pop-up window will appear. Check the box and confirm your action.
These steps effectively unsync Edge from Chrome, ensuring that your browsers operate independently.
Reverting Changes
If you ever decide to enable syncing again, follow the same steps. However, in Step 4, click on "Turn On" and choose the profile for data importation.
Final Thoughts
This article provides a straightforward solution to the syncing issue between Edge and Chrome, offering a quick and effective way to enhance your browsing privacy and eliminate compatibility concerns. If you found this guide helpful, consider sharing it with others facing similar challenges. Take control of your browser data and enjoy a more tailored and secure online experience.


